Archive for Recipes

Finally. . .Ramps!

I’m not sure if you remember, but last spring I wrote a rather pathetic post about my futile search for ramps. I had never tasted these coveted spring onions before, and visits to both my neighborhood and Union Square farmers’ markets were busts. Reading other bloggers rave on and on about ramps without knowing what was so special about them spun me into a ramp-related tizzy, and I remained so for the rest of 2009.

Well, I can finally relax. Over the weekend Jim came home with a bag of these slender greens from one of our local fruit and vegetable stands. With the help of this recipe, we took some whole-wheat dough out of the freezer and layered the ramps into a quick pizza bianca. With just olive oil, mozzarella, and a sprinkle of parmesan cheese acting as the base of the pie, Jim and I were able to revel in the pure, onion-like flavors of spring’s first sprouts.

While I’m happy to declare the end of my ramp-infused innocence, I’m not sure I understand the frenzy that begins when ramps hit the farmers’ market every year. Sure, they are only available for a few short weeks in early spring. And I understand that by the time ramps arrive everyone is sick of winter root vegetables and any sign of fresh spring vegetables is a welcome relief. But the fetishization of ramps seems to have reached a fever pitch in the past few years; David Kamp, the author of The United States of Arugula, agrees. He recently declared ramps the new arugula, in the way this formerly little known food product was once over celebrated and scrutinized back in the eighties. Last week Steve Cuozzo of the New York Post went further and said ramps are simply overrated. Of course, these are just a few dissenting voices in a sea of ramp enthusiasts, so I suppose I should keep my griping to a minimum.

What do you think, readers? Do ramps deserve the hype? Am I just a grump? Don’t answer that last question…

Recipe for Pizza with Ramps (adapted from The Kitchen Sink Recipes)

  • 1 ball of your favorite pizza dough, white or whole-wheat
  • salt
  • 1 bunch of ramps, washed, with the bottoms trimmed
  • cornmeal
  • extra-virgin olive oil
  • 8 oz. mozzarella cheese, grated
  • a small amount of grated parmesan cheese (less than 1/4 cup)
  • freshly ground black pepper

Preheat your oven to 450 degrees. (I use a pizza stone, so I am basing this recipe on this method.) Place your pizza stone in the oven so it can preheat.

While your pizza stone heats, put a medium size pot of salted water on the stove to boil. While you wait for the water to boil, roll out your pizza dough into a circle on a floured surface.

When the water is boiling, add the ramps. Let them boil for a minute or two, then drain and set aside.

Remove your pizza stone from the oven and sprinkle it with cornmeal. Place your circle of dough on a pizza peal. Brush it with olive oil. Sprinkle it with the mozzarella cheese. Place the ramps on top of the cheese so that they radiate out from the center of the pie. Sprinkle the pie with parmesan cheese. Drizzle a tablespoon of olive oil across the top of the pie. Season with black pepper. Carefully transfer the pie to your pizza stone.

Bake the pizza for about 10-15 minutes. Remove it from the oven when ready and top with another tablespoon of olive oil. Let it cool for about 5 minutes before cutting. Serves 3 to 4 people. Enjoy!

Comments (13) »

Homemade Orecchiette

Three years ago, my inaugural post on this blog was about making fresh pasta. Jim and I had pulled our never-used pasta machine out from storage, mixed together an egg-based dough, and cranked out an overwhelming quantity of linguine for the first time. Despite this successful experience—and apart from two other tiring experiments with homemade ravioli and ricotta gnocchi—making fresh pasta never became a habit for us. But on Sunday I was feeling adventurous and energized, and decided to try my hand at it again, this time with orecchiette.

Orecchiette means “little ears” in Italian. Small and circular with an indented center (hence the name), they are typical of the Southern region of Puglia, the area where my mother is from. Puglia’s flat landscape and arid temperatures are ideal for wheat production, making pasta and bread the most substantial elements of the region’s cuisine.

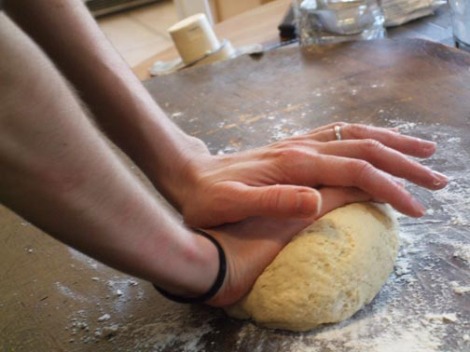
One of the interesting things about orecchiette and other traditional pastas from Southern Italy (such as cavatelli and strozzapreti) is that the dough is often made without eggs—flour, water, and salt are the main ingredients. A mixture of semolina and white flour forms the base of what becomes a chewy, dense pasta that can stand up to the most aggressive sauces. I have to say, this is one of the easiest doughs I have ever worked with. The absence of eggs creates an elastic dough that is quickly kneaded into a smooth ball, ready for shaping.

The rest of the steps on Sunday were decidedly un-exhausting. I divided the dough into 8 equal pieces, rolling each one into a long rope. After cutting them into compact squares, I pushed my thumb in the middle of each piece and gently dragged them a short way across my pasta board, creating a series of concave disks. I’ll admit, my first few attempts looked more like Fritos corn chips than perfectly circular orecchiette, but these are supposed to be rustic, right? Eventually I got the hang of it, and before I knew it, two cookie sheets were full of orecchiette waiting to be cooked.

In order to keep with the Puglian theme, I used my homemade “ears” in one of the region’s iconic dishes: orecchiette with sausage and broccoli rabe. Because of their cup-like shape, orecchiette are rarely paired with smooth tomato- or cream-based sauces; chunkier sauces with meat or vegetables work better with this particular pasta. While the orecchiette cooked, I combined some blanched broccoli rabe with olive oil, garlic, and our favorite fennel sausage from our local pork store. Once tossed with these ingredients, the orecchiette formed a neutral, sturdy base for the bitter greens and strongly spiced meat, a classic combination that works every time. Now that I know how easy it is to make orecchiette, I see many more Puglian Sundays in our future. Cavatelli, here we come!

Recipe for Homemade Orecchiette with Fennel Sausage and Broccoli Rabe

For the pasta dough (recipe adapted from Michele Scicolone’s A Fresh Taste of Italy):

  • 1-1/2 cups all-purpose flour
  • 1 cup semolina flour
  • 1 teaspoon salt
  • 3/4 cup warm water

Combine the all-purpose and semolina flours and the salt in a food processor. With the machine running, slowly add the water, until a stiff ball of dough forms. Remove the dough from the processor and place it on a lightly floured surface. Knead the dough until it is smooth and elastic, about a minute or two.

Divide the dough into 8 equal pieces. Take one piece and keep the remaining pieces covered with the inverted food processor bowl or another bowl. Taking the dough between your hands, roll it into a long rope about 1/2-inch thick. Cut the rope into 1/2-inch pieces. With your thumb parallel to the long side of each piece, push it into the center of the dough and slightly drag the piece backwards. It will curl around your thumb, creating a concave disk. Set aside and repeat with the next piece of dough. When finished with all the dough, place the orecchiette on cookie sheets lined with napkins and a light dusting of flour. Cook right away or freeze. You should wind up with about a pound of pasta.

To freeze the pasta, place the filled cookie sheets in the freezer. Freeze until they are solid (about an hour or two) and then transfer the orecchiette to freezer-safe bags. They can be frozen for up to one month. When you are ready to use them, don’t defrost them. Add them directly to boiling, salted water and cook as usual.

For the Sauce:

  • sea salt
  • 1 bunch of broccoli rabe, washed with ends trimmed
  • 4 links of high quality fennel sausage
  • 1 tablespoon olive oil
  • 1 clove of garlic, minced
  • salt
  • pepper
  • pecorino romano or parmesan cheese

Preheat the broiler. Bring a large pot of water (big enough to hold the pasta) to a boil. Season with sea salt. Add the broccoli rabe and blanch for about 3 to 5 minutes. Using tongs, remove the rabe from the water and set aside. Chop roughly into smaller pieces. Do not drain the boiling water.

While the broccoli rabe is cooking, cook the sausages under the broiler for about 6 minutes, turning them after 3 minutes. Remove from the broiler and slice into 1/2-inch pieces. The pieces will probably still be a little pink in the middle.

Add the pasta to the boiling broccoli rabe water, and cook until al dente, about 10 to 13 minutes. While the pasta is cooking, heat the olive oil over medium heat in a large skillet. Add the garlic and sauté until soft, about 3 to 5 minutes. Do not let it brown. Add the sausage and the broccoli rabe to the pan, cooking until done, about 5 to 7 minutes. Drain the pasta when ready.

Toss the broccoli rabe and sausage with the cooked pasta. Add a glug of olive oil and season with salt and pepper. Spoon into bowls and sprinkle with pecorino romano or parmesan cheese. Serves 4. Enjoy!

Comments (6) »

From Leaf to Stem

Every few weeks I find myself in the same position: Hunkered down in front of my open refrigerator with a plastic bag in hand, tossing withered produce and uneaten leftovers into the trash. Limp, yellowed parsley; saggy celery; dried-out chunks of onion; I’m always surprised at—and disappointed by—the amount of food that Jim and I waste each week.

In contrast to my guilt-inducing produce situation, Cathy Erway (of the popular blog Not Eating Out in New York) talks about her success with limiting food waste in her lovely new book, The Art of Eating In. As part of her desire to cook more and spend less, Erway employs often-discarded vegetable accessories such as beet greens and fennel fronds in her dishes, so that no part of the vegetable goes unused. While reading these pages, all I could think was I bet celery never goes bad in Cathy’s fridge. I hung my head in shame and once again vowed to change my ways. Surprisingly, I actually had some luck doing so.

It started with a big, floppy bunch of Swiss chard. I removed the stems and combined the pink-rimmed leaves with some leftover baby spinach, onions, feta cheese, and phyllo dough for a gorgeous Greek-inspired vegetarian pie. This light, flaky pie lasted us through one dinner and several lunches; not a single bite was left behind. And as I emptied the crisper drawers of plastic spinach containers and leftover cheese wrappers, I placed the Swiss chard stems in their place, instead of throwing them in the trash like I often do.

For the next few days, those stems stared at me every time I reached past them for tomatoes or salad greens. Finally, when they were about to turn, I pulled out a recipe for baked Swiss chard stems that I’d been saving for years. Similar to a casserole, the stems are layered with tomato sauce, garlic, and parmesan cheese, and baked in the oven until golden brown. Classic Italian flavors combine with an overlooked yet ruby-red vegetable for a satisfying side dish. And the best part was, not a single part of that Swiss chard went to waste. Not only was I proud of myself—and happy that I evaded another round of chard-induced guilt—but I discovered a delicious new side as well. I hope the trend continues; maybe I should try beet greens next. Thanks for the inspiration, Cathy!

Recipe for Baked Swiss Chard Stems with Tomatoes, Garlic, and Parmesan (adapted from Jack Bishop’s recipe as published in the New York Times on April 5, 2000)

  • 1/2 lb chard stems, bruised parts trimmed, halved crosswise
  • salt
  • 1 tablespoon extra-virgin olive oil, plus more for baking dish
  • 2 small garlic cloves, chopped
  • 1-14 1/2 ounce can of diced tomatoes, drained
  • 1 tablespoon minced parsley
  • freshly ground black pepper
  • 1/4 cup parmesan cheese

Preheat the oven to 400 degrees. Bring a few quarts of salted water to boil in a large pot. Add the chard stems and cook until they are tender, about 10 minutes. Drain.

Meanwhile, heat the olive oil over medium in a medium skillet. Add the garlic and cook until golden, about 2 minutes. Add tomatoes and simmer until sauce is almost dry, about 5 minutes. Add salt and pepper to taste.

Cover the bottom of a lightly greased baking dish with a single layer of chard, cutting stems if necessary to fit them in the dish. Spoon a bit of tomato sauce over the stems, and sprinkle with a little cheese. Repeat with the next layer of chard, alternating the direction of the stems. Finish tomato sauce and cheese. Sprinkle the parsley across the top.

Bake until chard is very tender and top layer is browned, about 25 minutes. Remove pan from the oven and let settle for 5 minutes. Cut into squares and serve. Serves 4 as a side dish. Enjoy!

Comments (4) »

Cooking with Mom: Beef Pizzaiola

When I was a kid, I never thought about where my next meal was coming from. All I knew was that sooner or later my mother would call me into the kitchen from playing outside to sit down with the rest of my family and eat the dinner she had prepared for us. More often than not, her meals were inspired by her Southern Italian upbringing. Spaghetti with marinara sauce, roast chicken with potatoes and bread crumbs, stuffed eggplants and artichokes—these are the dishes I remember from my childhood and have always wanted to make my own.

Last week I invited my mother to my apartment so we could cook one of her classic Italian recipes together: Beef Pizzaiola. It’s a simple, one-pot meal of tomato sauce and chuck steak with a spicy yet comforting aroma I can recognize immediately. The word pizzaiola means pizza-style, and refers to a tomato sauce made with garlic and oregano. I tried to do some research about this recipe’s origins, but all I could find was a short note about how this humble dish doesn’t have a defined history; no one has ever laid claim to it because it’s just that simple.

Now, let me make something clear: my mother and I cooked her version of this herb-filled, meaty sauce. There are many variations of this dish online and in cookbooks, but we made the version that has existed in her Apuglian family for generations. I have no idea which recipe is more authentic than another, as every region and every tiny village in Italy has its own culinary traditions. This is ours.

My mother’s recipe is very straightforward: Take some chuck steak, a can of whole tomatoes (pureed in the food processor), a bit of garlic, a few handfuls of pecorino romano cheese, parsley, oregano, and a few glugs of olive oil, and throw it all in a big pot. I should note here that my mother does not measure her ingredients; she eyeballs them, which is why I needed to cook with her and try to write down all the steps. Anyway, the ingredients sit one on top of the other, in festive layers of green, red, and white, until they come to a boil. Then you just let the whole mixture of beef and tomatoes simmer away for an hour or so, stirring it here and there, until the meat is very tender and can be pulled apart with a fork.

Served over spaghetti with some meat on the side or as a secondo, this sauce is completely different from your everyday marinara. Dark red, abundantly spiked with gutsy oregano and salty romano cheese, pizzaiola is a hearty, in-your-face type of sauce. Infused with flavor from the slow-cooked meat, the sauce is deep and satisfying, and an appropriate remedy for these cold winter days. And while chuck steak can be rather tough, in this dish it’s transformed into a soft, satisfying bit of protein.

As you can probably tell, the pizzaiola tasted as wonderful as I remembered. I just hope it will again next time, when I attempt to make it without my mother.

Recipe for Mom’s Beef Pizzaiola

  • 1 1/2 pounds chuck steak
  • 1 28-ounce can of whole, peeled tomatoes
  • 2 cloves of garlic, minced
  • 1/4 cup parsley leaves
  • 1/3 cup pecorino romano cheese, grated
  • 1 1/2 tablespoons dried oregano
  • 1 tablespoon olive oil
  • 1 pound of spaghetti

Cut each steak roughly into thirds. You should try to achieve equally-sized chunks of meat, following the natural lines of the steaks.

Pulse the tomatoes a few times in the food processor. They should be left a little chunky; they do not need to be perfectly smooth.

Combine the meat and the tomatoes in a big pot. Add the garlic, parsley, cheese, oregano, and olive oil. Do not stir.

Bring to a boil over medium heat. Lower heat and bring to a simmer. Cover. Stir every once in a while, making sure the meat doesn’t burn and the cheese doesn’t clump together. If the sauce seems to reduce too much and becomes too thick, add a little bit of water to the pot. Once the sauce is simmering, bring a big pot of salted water to boil for the spaghetti.

Cook for about an hour, until the meat is soft and breaking apart with a fork. About fifteen minutes before the sauce is done, cook the spaghetti.

When the spaghetti is drained, stir with 2 or 3 spoonfuls of sauce. Plate the spaghetti, and generously sprinkle each dish with romano cheese. Top with sauce. Serve the meat on the side or after the spaghetti course is finished. Serves 4 with leftovers. Enjoy!

Comments (3) »

Snow Day

Last Wednesday morning I shuffled to the window in my robe and slippers, took one look at the fat, drippy snowflakes swirling around outside, and immediately gave myself a snow day. It was the morning after my birthday, after all, and as a child of February I figured I deserved it. So while thick piles of snow quickly covered the brownstones, trees, and sidewalks outside my Brooklyn apartment, I huddled under a blanket inside. I passed the hours drinking tea, watching Lost, and checking my work email here and there. When I finally finished lazing around on the couch, I made my way over to the kitchen and started cooking.

Cold, snowy days call for slow-cooked comfort food, and as soon as I heard the weather reports earlier in the week I began planning the perfect snow day dinner. I wanted something warm and rustic, a dish to make us forget the chilling winds and falling flakes outside. Florence Fabricant’s Chicken Baked with Lentils, a recipe I had saved for just such an occasion, came to mind immediately, and I made sure I had all the ingredients on hand before the snow started falling.

In this recipe, chicken thighs are nestled in an earthy cloud of cumin-spiced lentils, pancetta, radicchio, and chicken stock. Piled into a baking dish or casserole, the mixture cooks away for a tranquil hour in the oven, the liquid slowly reducing into a saucelike consistency. Soon enough, the comforting aroma of baked chicken infused my apartment, and the snow seemed very far away indeed.

When finally pulled from the oven, the spicy lentils become a complex mix of smoky (provided by the pancetta), tangy (from the radicchio), and sweet (the onions), while the chicken remains moist and tender, absorbing the essence of the lentils in a more subtle way. Dominating this dish in terms of both flavor and quantity, the legumes retain a hint of firmness, and provide a supportive bed for the meaty chicken thighs. Together they’re a hearty, one-pot wonder of a meal, and if we’re lucky enough to have another snow day, I may even have to make this again.

Chicken Baked with Lentils (adapted from Florence Fabricant’s recipe in the New York Times)

  • 1 tablespoon extra-virgin olive oil
  • 1 thin slice of pancetta (less than 1/4 lb)
  • 4 chicken thighs, patted dry
  • salt and freshly ground black pepper
  • 1 cup of finely chopped onions
  • 1/4 cup finely chopped celery
  • 2 cloves of garlic, sliced
  • 1 teaspoon ground cumin
  • 1 cup finely chopped radicchio
  • 1/2 tablespoon red wine vinegar
  • 1 tablespoon minced fresh sage
  • 1 cup of French green lentils
  • 1 cup chicken stock
  • 1/2 cup water*

Heat the olive oil over medium heat in a Dutch oven or another ovenproof casserole dish. Add the pancetta and cook on medium heat until golden. Remove the pancetta and set aside. Season the chicken thighs with salt and pepper and add them to the pot, skin side down. Sear until golden on medium-high heat. Remove from the pan and set aside. Preheat oven to 300 degrees. Remove one tablespoon of fat from the pan and set aside. Pour out the rest of the fat and discard. Return the tablespoon of fat to the pan.

Add onions, celery, and garlic. Cook on medium until soft and translucent, about 10-15 minutes. Stir in the cumin. Add the radicchio, vinegar, and sage. Sauté briefly. Add lentils, stock, water, and cooked pancetta.

*I used 1 cup chicken stock plus 1/2 cup water because I cheated and used prepared chicken stock from a box. When I use commercial stock I like to dilute it a little bit with water. If you are using homemade chicken stock, feel free to use 1 1/2 cups chicken stock and disregard the water.

Return the chicken to the pan, bring to a simmer, cover, and place in the oven. Cook for about an hour, checking on the lentils occasionally. Cook until the lentils are tender and most of the liquid has been absorbed. Lentils should be saucelike, but not soupy. Add more stock if necessary. Add more salt and pepper if necessary, then serve. Recipe serves 3 to 4 people, or 2 to 3 people with leftovers. Enjoy!

Leave a comment »